In the AI era, Command Line Interface (CLI) tools are experiencing a renaissance. Why? Because CLI tools are naturally AI-Agent friendly!
Compared to graphical interfaces, CLI tools have structured input/output, clear help documentation, and predictable behavior patterns—these characteristics make it much easier for AI Agents to understand, learn, and automate CLI tool usage.
But have you ever struggled with creating a fully-functional CLI tool:
Tedious command-line argument parsing?
Chaotic configuration management?
Difficult-to-maintain help documentation?
Want to extend with plugins but don't know where to start?
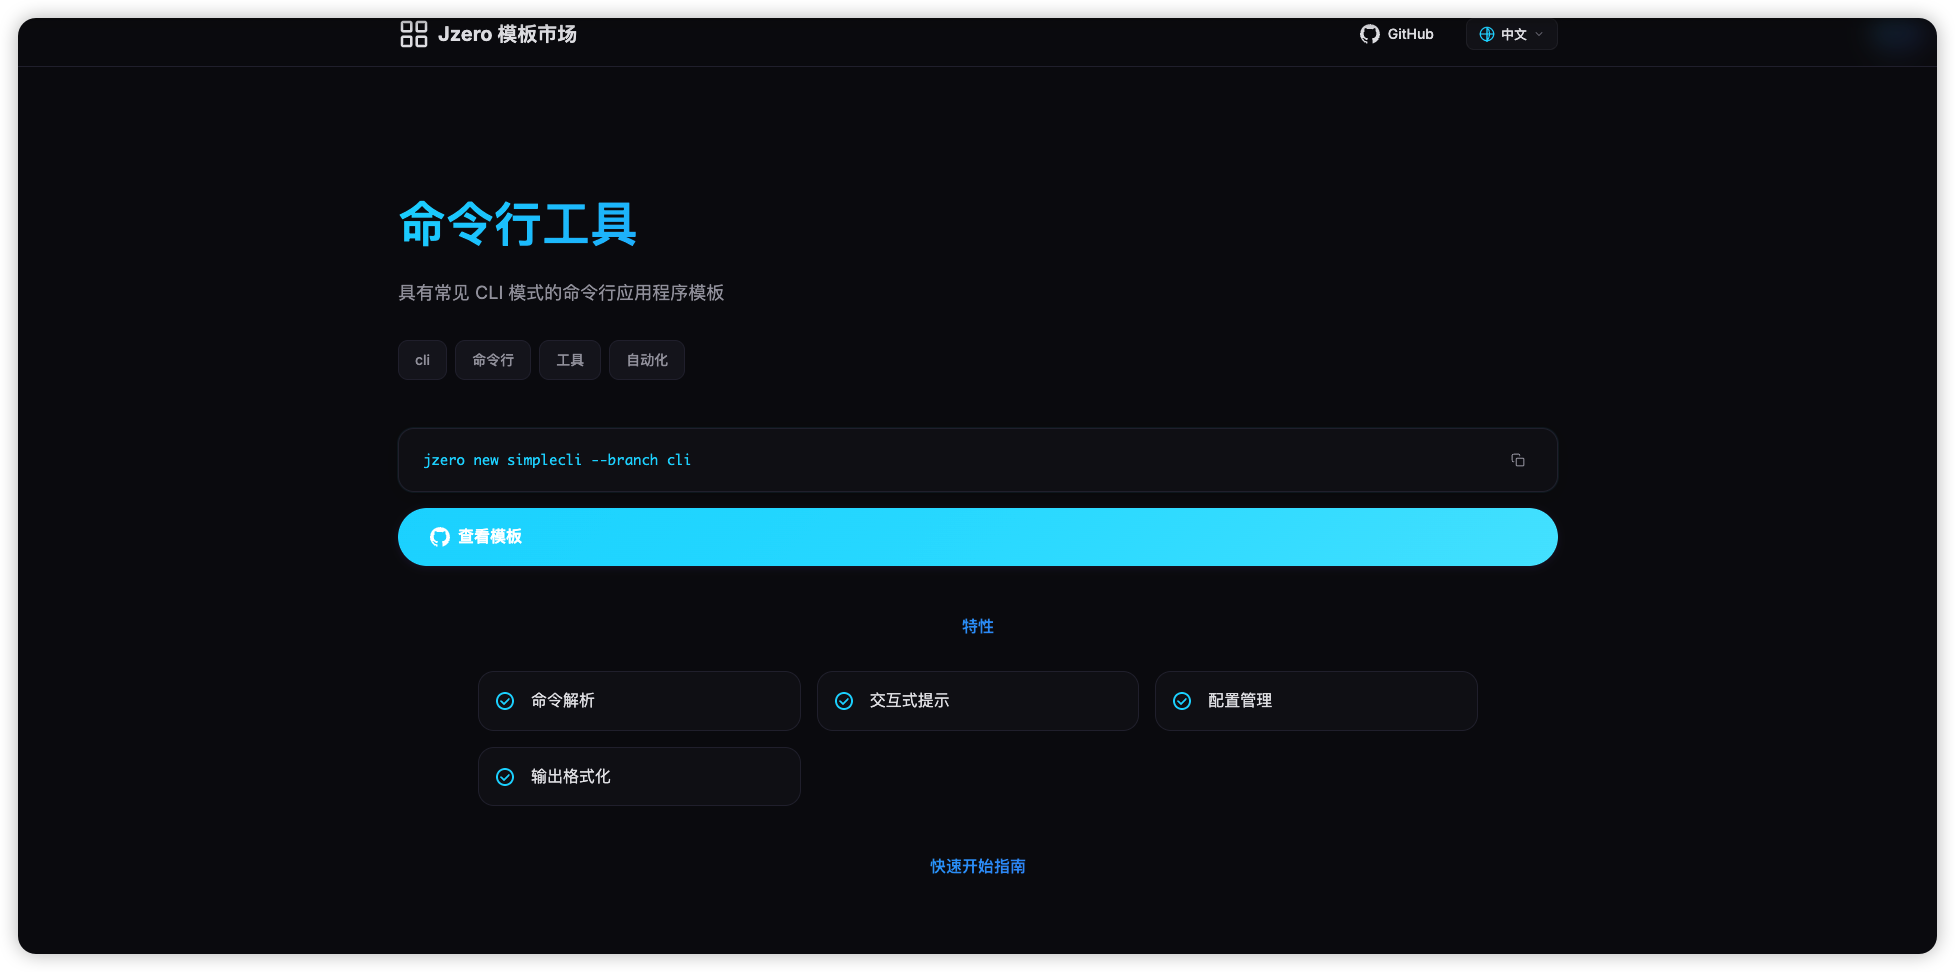
💡 First, let's introduce the jzero template market
jzero provides a rich collection of official templates and third-party templates to help you quickly build various types of projects:
🚀 Built-in Templates:
RPC Template: High-performance gRPC microservice framework based on Protocol Buffers
API Template: Lightweight RESTful API service framework based on API description language
Gateway Template: High-performance API gateway supporting both gRPC and HTTP protocols
📦 Official External Templates:
CLI Template: Command-line application template with common CLI patterns (today's star!)
API Template: API template optimized for Vercel deployment
Documentation Template: Documentation site template using VuePress Hope theme
🌍 Third-party Templates:
Contributions welcome! Share your own template to help more developers start projects quickly!
The jzero CLI template is built on the industry-standard Cobra framework, providing an out-of-the-box project structure and best-practice configurations. Compared to building from scratch, using the jzero CLI template enables you to:
✅ Quick Start: Generate a complete project structure with one click, no tedious configuration needed ✅ Unified Standards: Follow industry standards with clear, understandable command structure ✅ Feature-Complete: Built-in enterprise-grade features like configuration management, plugin system, debug mode ✅ Easy Extension: Plugin architecture for easily adding new features ✅ AI-Friendly: Perfect cooperation with Claude, GPT, and other AI tools to boost development efficiency
# 1. Install jzero (if not already installed)go install github.com/jzero-io/jzero/cmd/jzero@latest# 2. Create a new CLI projectjzero new mycli --branch clicd mycli# 3. Install dependencies and buildgo mod tidygo build# 4. Test run./mycli version
Output example:
mycli version 1.0.0 darwin/amd64Go version go1.21.0Git commit abc123Build date 2024-01-01 12:00:00 +0000 UTC
It's that simple! You now have a fully-functional CLI tool framework.
Commands are direct subcommands under the root command, representing major functional modules.
mycli version # Version command - display version informationmycli config # Config command - manage configurationmycli plugin # Plugin command - manage pluginsmycli server # Server command - start server
Sub Commands are the next level under commands, used to implement more granular functionality.
# Subcommands of config commandmycli config init # Initialize configurationmycli config set # Set configuration itemmycli config get # Get configuration itemmycli config list # List all configurations# Subcommands of plugin commandmycli plugin install # Install pluginmycli plugin remove # Remove pluginmycli plugin list # List pluginsmycli plugin update # Update plugin
Subcommand advantages:
✅ Modular functionality with clear logic
✅ Support multi-level nesting (e.g., mycli config database connect)
✅ Each subcommand can be developed and maintained independently
The jzero CLI template provides a unified configuration management system where all configuration is managed through internal/config/config.go. It supports three methods: configuration files, environment variables, and command-line flags, with automatic priority-based loading.
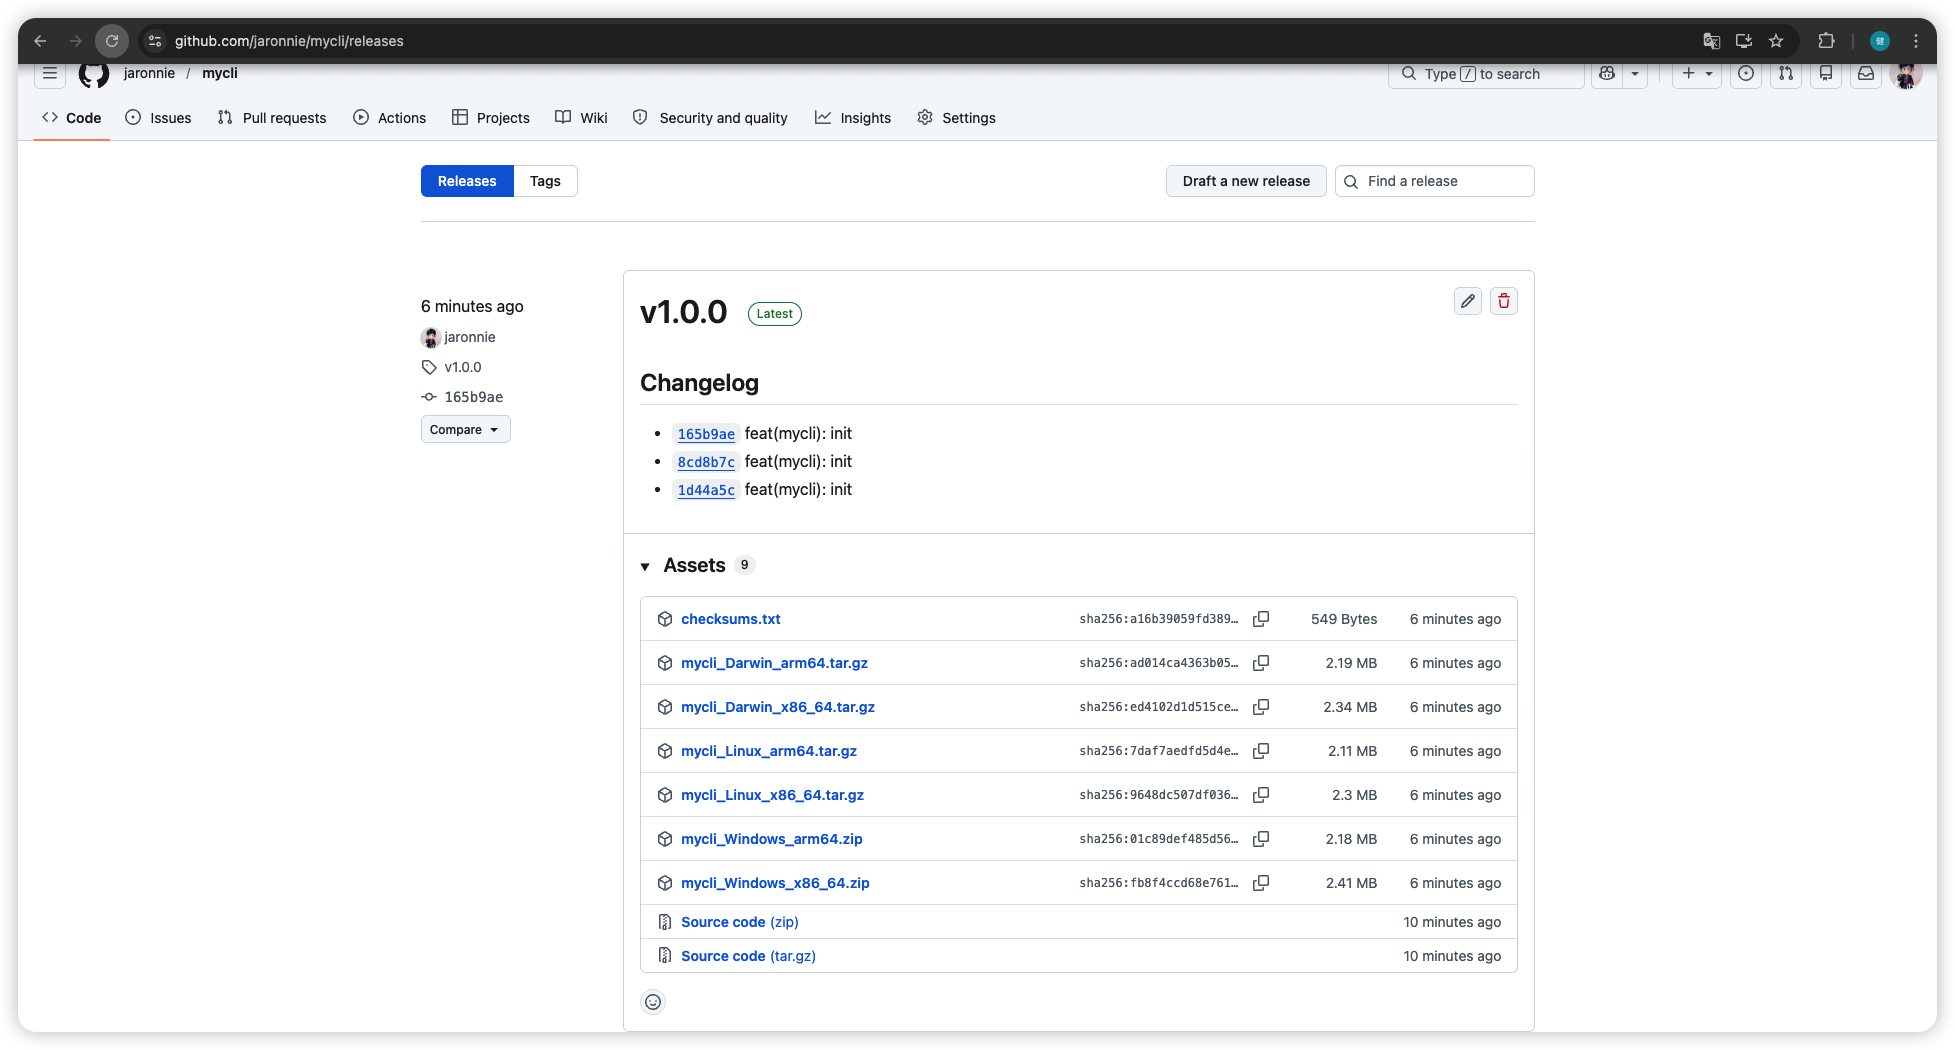
After development is complete, how do you conveniently distribute your CLI tool? GoReleaser combined with GitHub Actions enables automated building and releasing!
Note: Before using, you need to configure ACCESS_TOKEN in GitHub repository secrets (Settings → Secrets and variables → Actions → New repository secret) with write access to repository. You can generate a Personal Access Token (PAT) for this purpose.
name: Releaseon: push: tags: - 'v*'permissions: contents: writejobs: goreleaser: runs-on: ubuntu-latest steps: - name: Set up QEMU uses: docker/setup-qemu-action@v4 - name: Checkout uses: actions/checkout@v4 with: fetch-depth: 0 - name: Set up Go uses: actions/setup-go@v5 with: go-version: '1.23' - name: Get version id: get_version run: echo ::set-output name=VERSION::${GITHUB_REF/refs\/tags\//} - name: Run GoReleaser uses: goreleaser/goreleaser-action@v5 with: distribution: goreleaser args: release --clean env: GITHUB_TOKEN: ${{ secrets.ACCESS_TOKEN }} - name: Set up Docker Buildx uses: docker/setup-buildx-action@v4 - name: Log in to Docker Hub uses: docker/login-action@v4 with: registry: ghcr.io username: ${{ github.actor }} password: ${{ secrets.ACCESS_TOKEN }} - name: Docker build and push uses: docker/build-push-action@v6 with: registry: ghcr.io context: . platforms: linux/amd64,linux/arm64 push: true tags: | ghcr.io/${{ github.repository }}:latest ghcr.io/${{ github.repository }}:${{ steps.get_version.outputs.VERSION }}
# Install specific version directlygo install github.com/yourusername/mycli@v1.0.0# Install latest versiongo install github.com/yourusername/mycli@latest
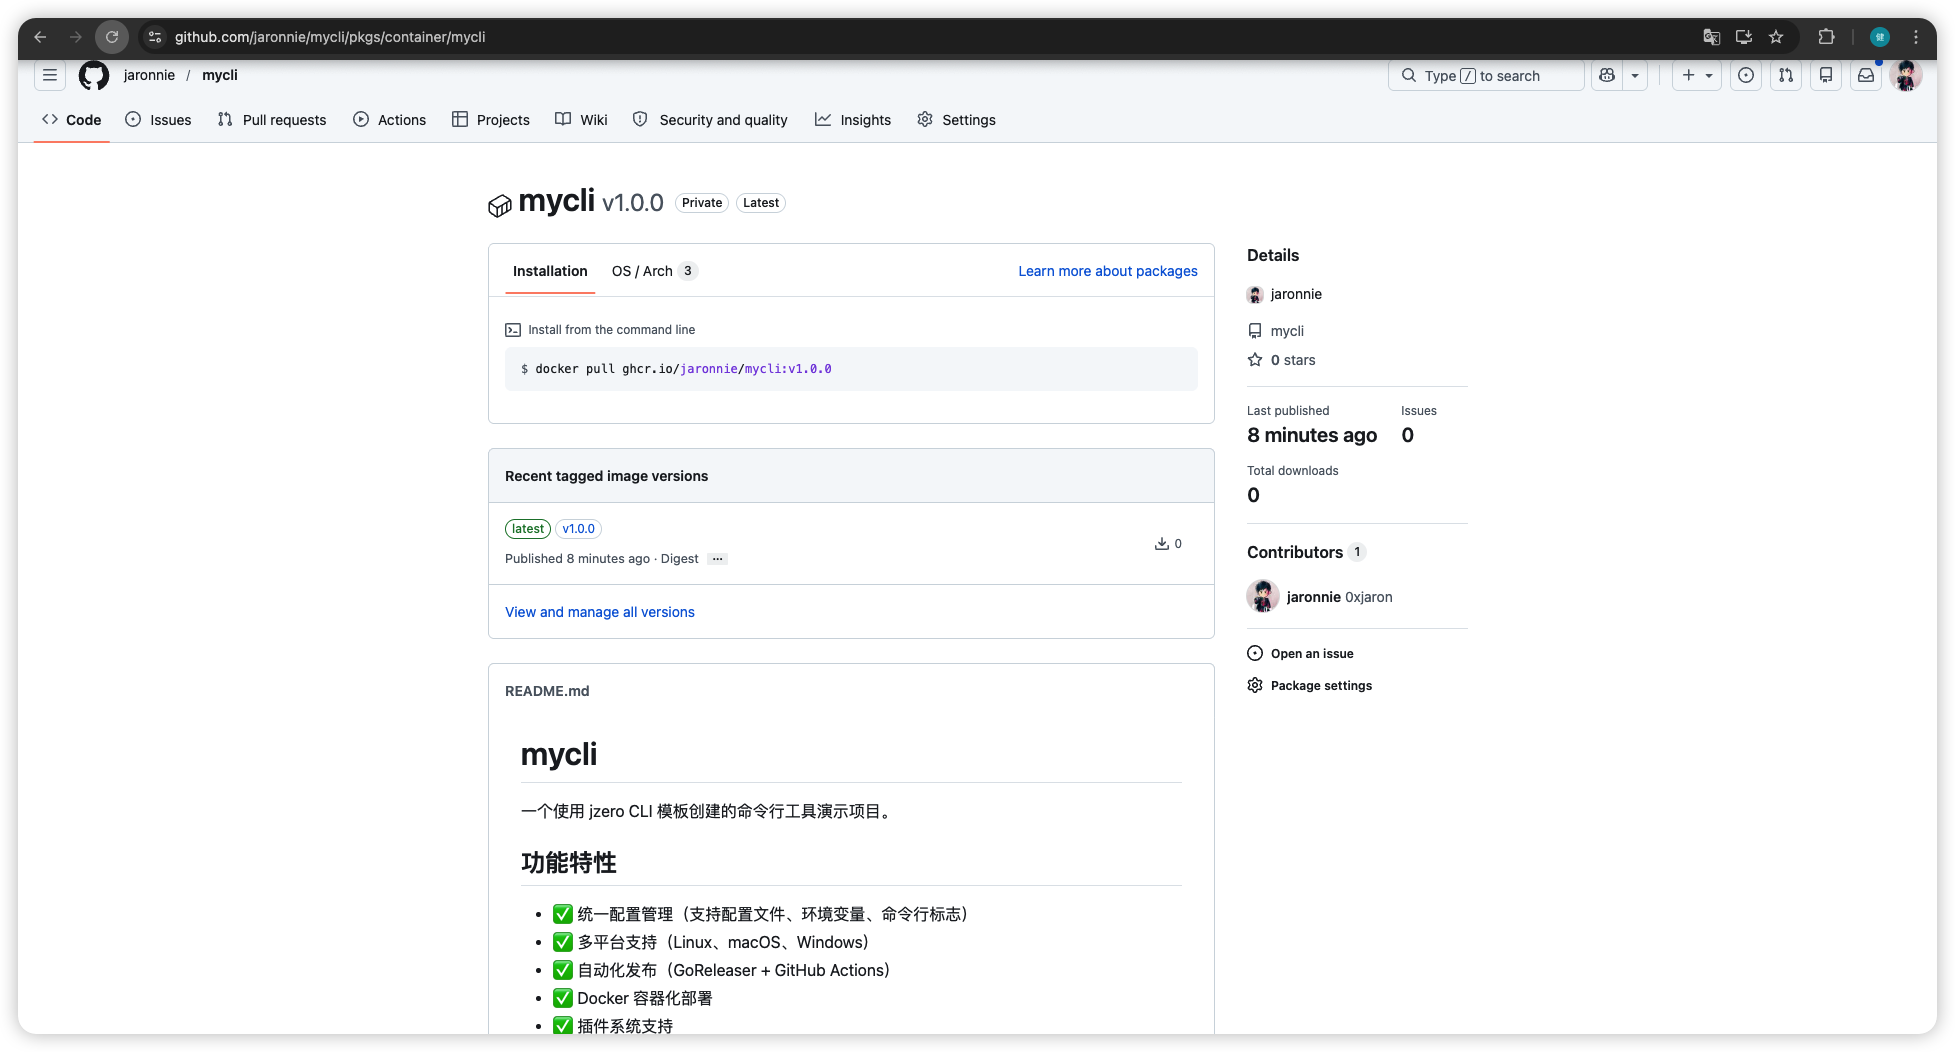
Method 3: Using Docker Image
# Run directlydocker run --rm ghcr.io/yourusername/mycli:latest version# Create an alias for conveniencealias mycli='docker run --rm -v $(pwd):/app -w /app ghcr.io/yourusername/mycli:latest'# Then use it like a local installationmycli versionmycli --help
Or create a shell script mycli-docker.sh:
#!/bin/bashdocker run --rm -v "$(pwd)":/app -w /app ghcr.io/yourusername/mycli:latest "$@"
# Clone the projectgit clone https://github.com/jaronnie/mycli.gitcd mycli# Install dependencies and buildgo mod tidygo build# Test run./mycli version./mycli greet./mycli greet --name Alice
You can directly use the mycli project as a base to develop your own CLI tool:
# Fork or clone the projectgit clone https://github.com/jaronnie/mycli.git your-clicd your-cli# Modify configuration# - Edit app name and description in main.go# - Change module path in go.mod# - Add your own commands# - Update README.md# Start developing!
This project demonstrates best practices for the jzero CLI template and serves as an excellent starting point for learning CLI tool development.

 Essential CLI Tool Guide for the AI Era